Installation – Guidance
Helpful Tips for Contractors and DIY
This could be your perfect home or garage renovation project – a renovation in lighting. Our system follows class II (low voltage low power) electrical wiring rules giving you far greater options than conventional lighting. Call us if you want to learn some easy installation tricks with our product to route wires quickly and hide them like a pro without needing to set foot in an attic.
In many areas you won’t need to be an electrician to install this but you need to follow your electrical code and building code rules specific to your area. If you don’t know what you are doing, hire a professional. We regularly cooperate with professionals to answer product specific recommendations. Our products are tested to UL and CSA standards and comply with those standards when our installation rules are followed.
Planning and executing your installation is simple for handy people and contractors, and can be summed up in the following high level steps:
- Prior to ordering, decide on whether you are using all recessed fixtures, all 3-axis fixtures, or some of each. For any 3-axis fixtures you need 1 hole plug behind fixture for connection to slide through regardless of wiring technique.
- Decide if you need any optional installation accessories including hole plugs or fixtures extensions. Prior to ordering, decide if you are wiring from an open or easily accessed soffit as in new construction, from the attic (fixture extensions may be helpful), or from the outside tucking wire into J-trim of facia (need hole plugs). Our kits give you all options if you are unsure so you can decide after you buy your lights.
- Plan the location of the DelphiTech power supply(s) and automation timer inside the home, and decide your runs from that location out to the soffit. The supply and timer need to have an appropriate temperature range and be placed where they can’t get wet. For small to mid-size homes 1 story homes, usually 2 runs with similar number of lights on each run. For small to mid-size 2 story homes with a lower level (like front entrance, garage) and an upper level, usually 1 run for lower level and 1-2 runs for upper level. If 20 lights or less, you only need one 5-amp supply. For larger systems, a 5-amp supply is needed for every 20 lights. If you are doing say 30 lights, it is generally good practice to try and have similar loads on each so you can add lights to a run in the future if you so desire. Our one page installation sheet found below should be read also, and in there you will see how many lights you can put on a run length – for example 11 lights anywhere on a 100 foot run.
- Getting runs from supply location is simple with Class 2 wiring rules. Some of the common techniques include out through an attached garage and into garage attic, trapped between a downspout and wall, up through a wiring tube into house attic, tucked into the corner trim of vinyl siding, and others. Speak with us for further clarification tips on routing this easily and professionally. An 18″ long 5/16″ installers bit you can find at a local hardware store for about $10 is handy. Depending on what you are drilling through, either a masonry or non masonry bit will be required.
- Decide if you want to purchase wire from us or locally and how much you will need. We will give you all information so you can purchase wire locally if you prefer that instead of from us.
- After ordering and receiving your lights, for each fixture type, remove a 1/4″ of red and black wires and tape to a fresh 9V battery (generates 9.6V new). This will give you up to an hour of full brightness playtime to fine tune your design prior to installation day. Go out when it is dark. You can experiment with fixture location, how many inches out from wall (usually 8″ works well), and tilt angle if any. Most people shine fixtures straight down. For two stories, instead of climbing a ladder to experiment, consider shining up from the ground to see effect on wall knowing that when it is installed on soffit, you will get the same effect coming down from the soffit instead. This step is optional, and can be skipped by contractors who already have familiarity with our lights, but what you are achieving by doing this is to know with certainty where you are drilling your holes on installation day. Once finished this, cut off the 1/4″ bare copper ends so you fixture can be used with our connectors properly on installation day.
- On installation day, mount your supply and timer inside and do your runs according to your plan. Fixtures may be connected along the way as you do each run.
- For recessed, drill a 2.25″ hole at fixture location according to your plan. A simple tool you can make is to take a piece of coat hanger and bend a 3.5″ right long right angle bend in one end. Drill a 1/8″ hole first, insert 3.5″ end into hole, and spin it and raise it 3.5″. This will sweep out a cylinder of clearance 3.5″ tall and 7″ in diameter so you know your recessed fixture will fit and springs have clearance to flip down. Then drill your larger hole with confidence there is no obstruction. Call us to get recommendations on 3-axis installation.
- Do your connection to main feed wire. We have photos on our website. Basically you remove about 3″ of outer insulation jacket, cut away nylon fibers, stagger the two connections, do red to red and black to black, and then tape it up with 3M 33 or 88 tape. You DO NOT cut the 18 AWG main feed wire at each fixture location but tap into instead. Details of steps vary depending on whether you are using attic, above soffit, or J-trim routing of main feed wire but will be self evident to a handy person, or call us for more information.
- Pre-tilt recessed fixture to 4:12 (notch) tilt location, flip springs along side of fixture, and insert into hole. When half way into hole, retilt to desired tilt angle (usually most fixtures are straight down) and then release fixture so springs continue to flip down and hold fixture snug to soffit.
- At far end of each run, if you don’t connect directly to a fixture, open up outer jacket so red and black inner wires are exposed, and tape them back separately along jacket so you are guaranteed red won’t short to black and red won’t short to a metal soffit.
- Turn on system at dusk. You can make fine adjustments to recessed fixtures in terms of any tilt adjustments by pulling them partially out of holes, re-tilting, and then letting them pull themselves back up snug to soffit under spring action.
- If system is flashing, you either have too many lights on a power supply, a short between red and black on one of the runs, or a short between red and soffit/facia if they are metal. We can help you with simple debug techniques if you have access to a multi-meter, or you can trace the runs by hand. Don’t leave a system flashing for many hours as this puts stress on supply, but you can leave it flashing while you are debugging your short if that is helpful.
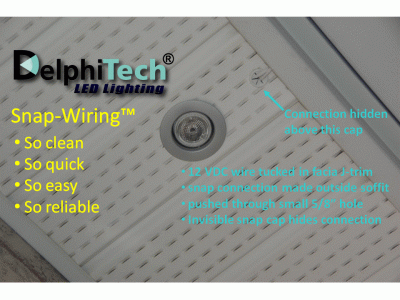
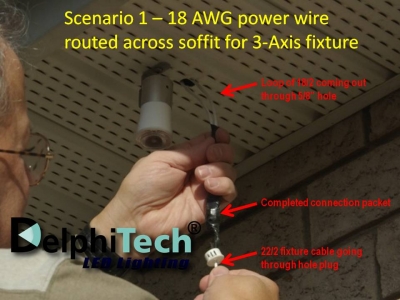
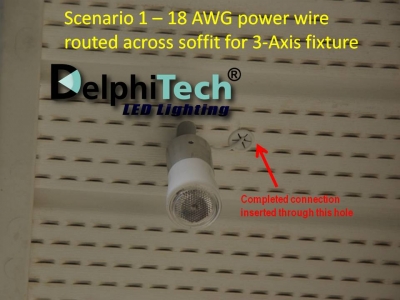
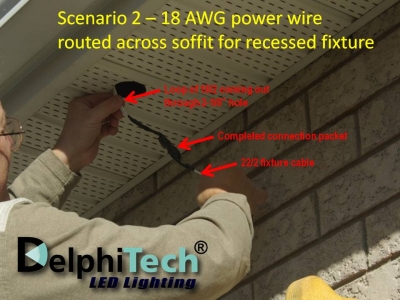
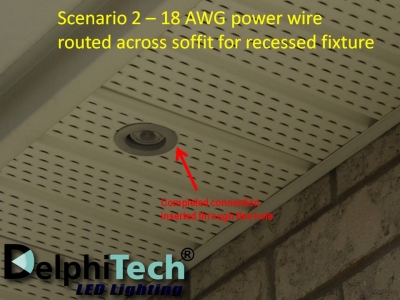
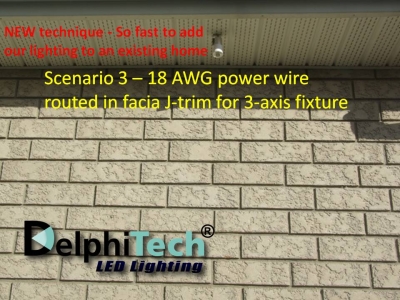
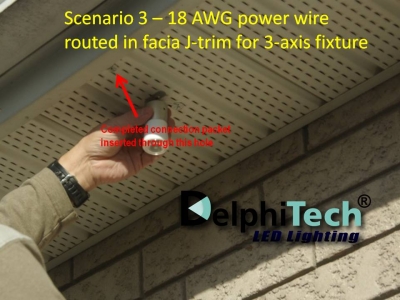
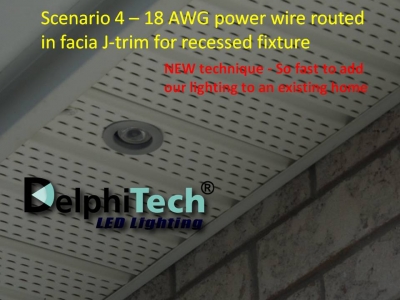
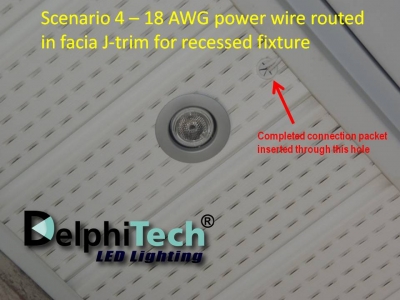
Below you will see some photos of recessed and 3-axis fixtures being installed with locations of hole plugs for various wiring scenarios, including above soffit wiring like in new construction, attic wiring with fixture extensions for an existing home, and tucking the wire into the J-trim of metal or vinyl soffit for an existing home or new construction.
To get in depth guidance, tips, and tricks order our enjoy our FREE technical support or order our optional design consultation service to ensure you get expert installation guidance and coaching for our products. Our design consultation service includes installation guidance for you or your contractor. Our guidance is geared towards a handy person.
The Consultation Service includes other tips, tricks and guidelines we can discuss with you to help you get it done quickly and correctly and we can help you plan your wiring routes too at your scheduled review session. Also, we use circuit simulation for long runs with lots of fixtures.
This provides more detail on step 6 above.
Optional Design Fine-tuning
Experienced contractors do not need this optional step, but some home owners may wish to experiment prior to installing or getting a contractor to install.
Due to our sophisticated smart driver in each fixture that adapts to voltage drops on long runs, all of our fixtures can be powered temporarily with a 9V battery as a temporary power source so you can verify your design options prior to installation.
To fine-tune your design, simply remove 1/4″ of red and black insulation and tape using 3M electrical tape to a new 9V battery to leads to get 30-60 minutes of full brightness experimentation time to determine location, distance from wall, and tilt angle if any. You don’t need to climb a ladder up to the 2nd story at night, simply shine it up near the ground to see the effect – beam width on soffit will be beam width on ground when mounted.
When you are done experimenting, remove the tape and then cut off the stripped 1/4″ ends prior to installing with supplied connectors on installation day.
Our free guidance is “on the house” literally and figuratively.


